
Knowledge, WordPress Troubleshooting
How to Safely Update WordPress Plugins
Jul
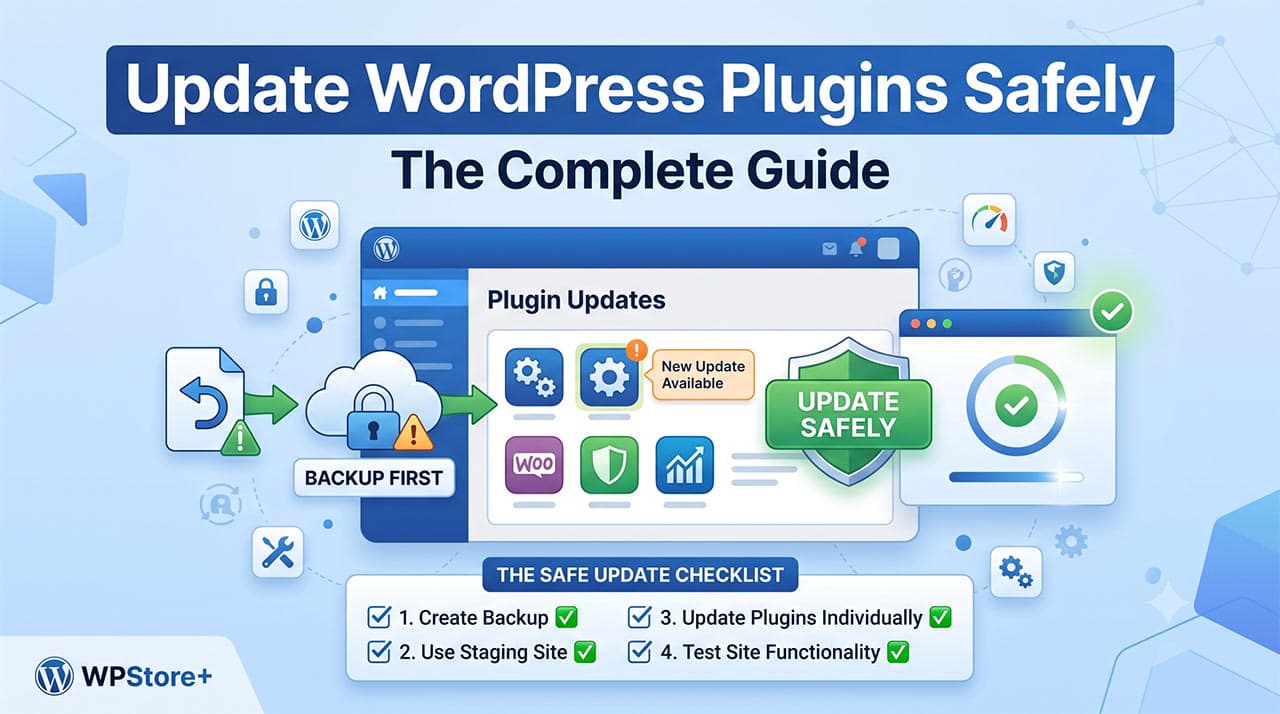
To update WordPress plugins safely is a fundamental administrative task that ensures your website remains secure, fast, and fully functional. Whenever plugin developers release new versions, they typically include critical security patches, performance enhancements, and new features. This documentation provides a structured, professional approach to updating your extensions. By adhering to these best practices, both beginners and experienced webmasters can maintain their WordPress environment efficiently without risking unexpected crashes, software conflicts, or permanent data loss.
Essential Steps for the Update Process
Proper preparation is the foundation of reliable website maintenance. While WordPress offers a simple one-click update feature, executing it without preliminary checks can result in severe software conflicts. Follow these structured steps to manage your downloads, validate licenses, and configure your site for a secure update.
Step 1: Validating Licenses and Reviewing Changelogs 🔐
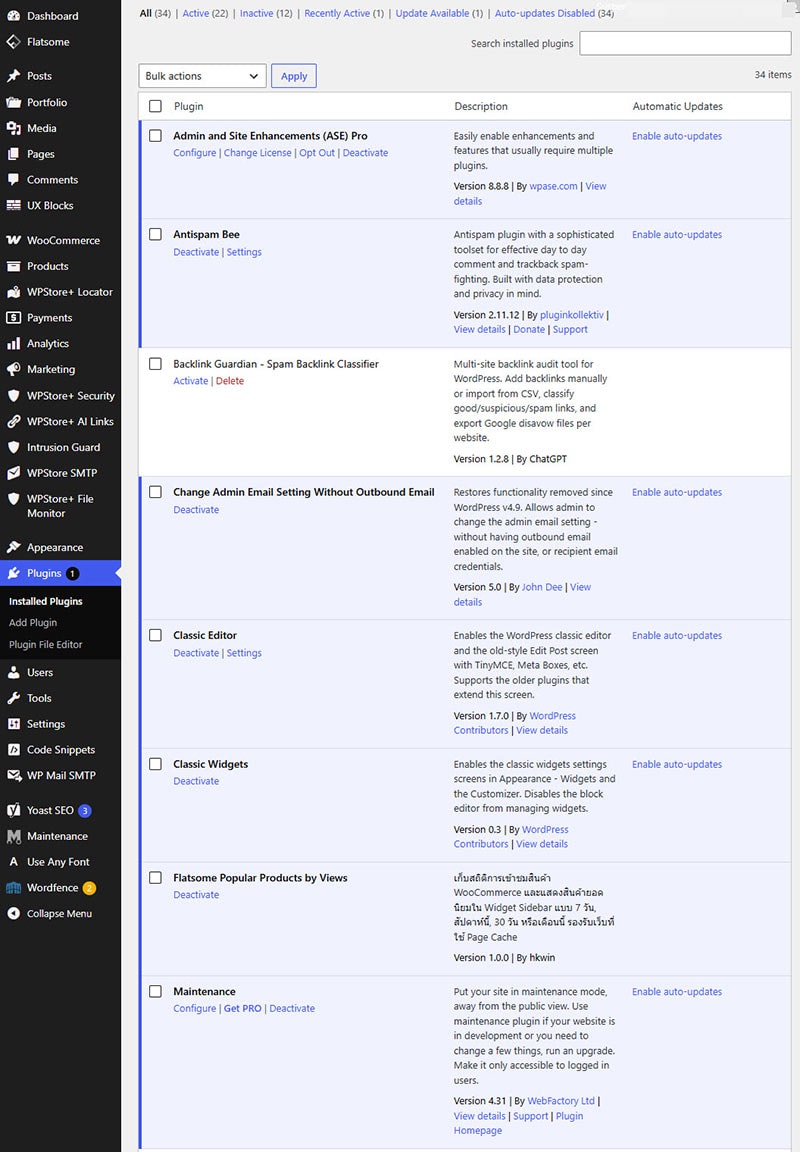
Before downloading or initiating any installation, navigate to your WordPress dashboard to check your active plugin licenses. Premium plugins require an authenticated license key to receive automatic updates directly from the developer’s server. If a license has expired, you must renew it or manually download the updated file from your WPStore+ account. Additionally, always review the plugin’s changelog before updating. The changelog details exactly what has been modified, added, or deprecated in the new version, helping you identify potential conflicts with your current theme or other active plugins.
Step 2: Creating a Complete Website Backup
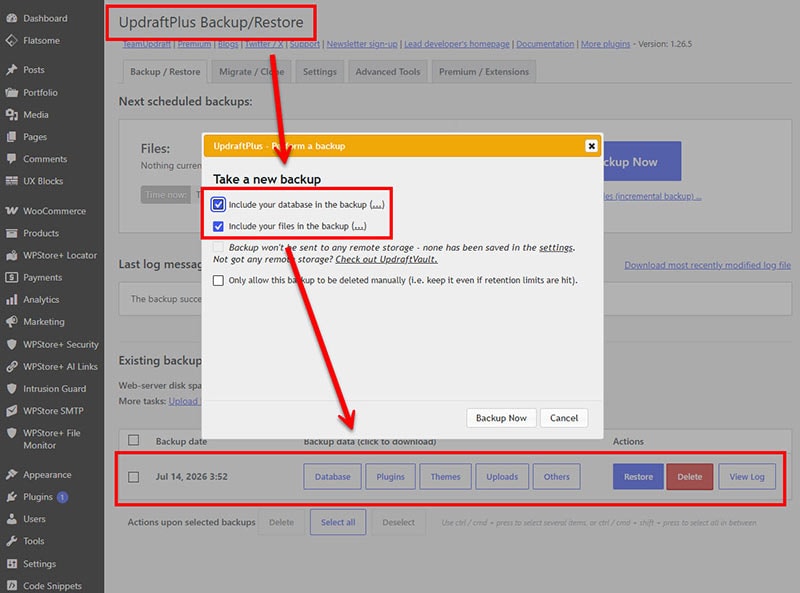
Never perform an update without a reliable, recent backup. In the event of a critical error or site crash, a backup allows you to restore your website to its previous functioning state instantly. Navigate to your preferred backup plugin and execute a full backup encompassing your database, media library, themes, and plugins. Verify that the backup archive is successfully stored on a secure remote destination, such as cloud storage, rather than just on your local web server.
Step 3: Utilizing a Staging Environment
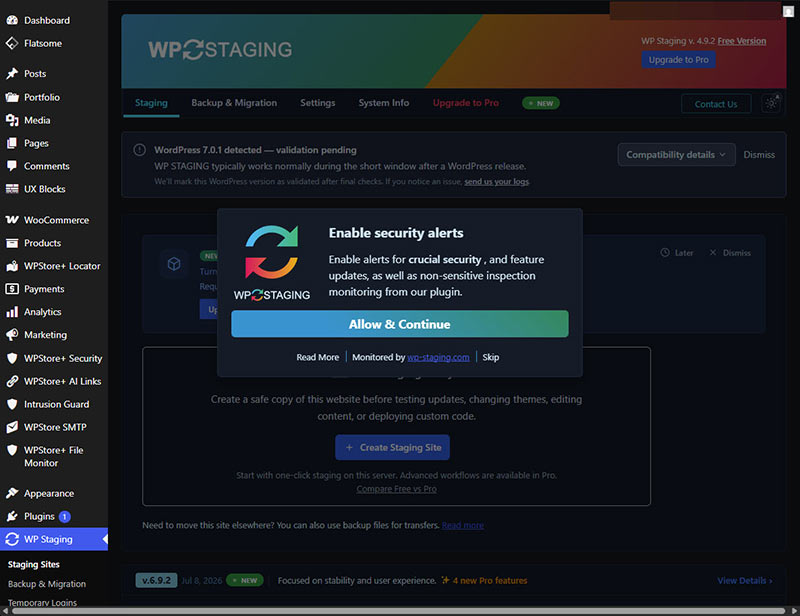
For mission-critical or e-commerce websites utilizing WooCommerce, applying updates directly to your live site is highly risky. Instead, create a staging site—a private, exact clone of your current website. Most modern hosting providers offer a one-click staging feature. By performing the download, installation, and activation of the new plugin versions on the staging site first, you can safely monitor how the updates interact with your existing infrastructure without impacting your actual visitors.
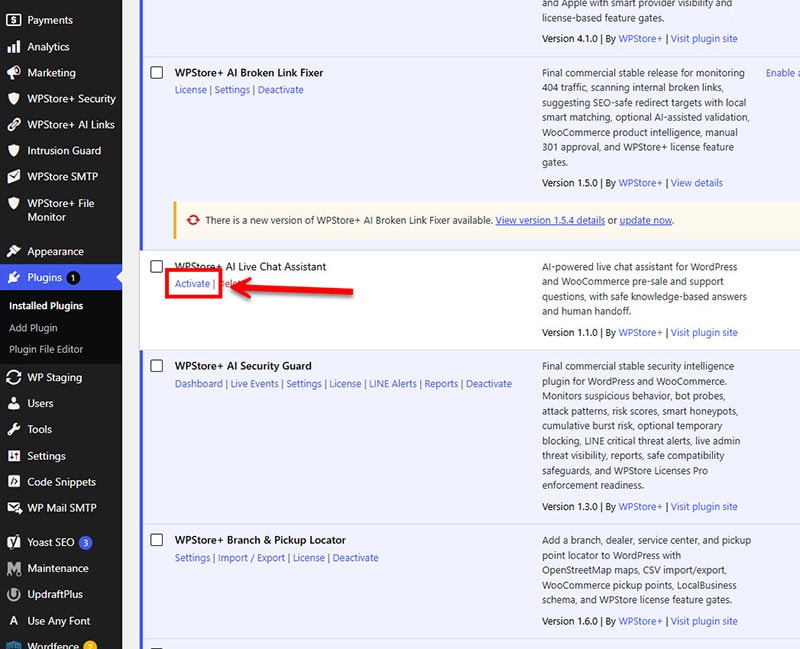
Step 4: Installing and Activating the Updates
Once your backup is secured and your staging environment is ready, you can proceed with the actual installation. Navigate to Dashboard > Updates or Plugins > Installed Plugins. Select the plugins you wish to update. It is highly recommended to update plugins one by one rather than selecting them all simultaneously in bulk. Bulk updating makes it difficult to pinpoint which specific plugin caused an error if your site goes offline. Click “Update Now” and wait for the maintenance mode process to complete entirely before navigating away from the page.
Testing the Plugin ✅
After the installation and activation of the new plugin versions are complete, rigorous testing is mandatory to ensure cross-compatibility. Begin by clearing your website’s cache entirely. This includes server-side caching, caching plugins, and your local browser cache. This crucial step ensures you are viewing and testing the most recent version of your site’s code.
Navigate to the front end of your website and meticulously click through essential pages. If you operate a WooCommerce store, perform a test transaction from adding an item to the cart to the final checkout page to verify that the purchasing process functions flawlessly. Log out of your administrator account and browse the site as a standard visitor.
Check the specific features managed by the recently updated plugins. For example, if you updated a contact form plugin, submit a test entry to confirm that the routing and email notifications operate correctly. Finally, right-click on your website, select “Inspect,” and view your browser’s console tab to identify any hidden JavaScript errors or backend warnings that may have been triggered by the update.
FAQs 💬
Q: Should I enable auto-updates for all my WordPress plugins? A: While auto-updates are convenient, they are generally not recommended for major functionality plugins, page builders, or WooCommerce extensions. Automatic updates bypass your ability to create a pre-update backup and test the site immediately afterward. It is much safer to manage them manually on a scheduled basis.
Q: What should I do if an update breaks my website and I cannot log in? A: Do not panic. If you lose access to your WordPress dashboard (often referred to as the White Screen of Death), access your site’s files via FTP or your hosting control panel’s File Manager. Navigate to the wp-content/plugins/ directory and simply rename the folder of the newly updated plugin (e.g., from plugin-name to plugin-name-deactivated). This action instantly deactivates the plugin and typically restores dashboard access. Afterward, you can safely restore your site from the backup you created in Step 2.
Q: How often should I check for and install updates? A: Establishing a weekly maintenance schedule is highly recommended for optimal performance. However, if a plugin developer releases a patch specifically designated as a “Critical Security Update,” you should prioritize installing it immediately to protect your site from known vulnerabilities.
Summary
Maintaining an up-to-date WordPress installation is a non-negotiable aspect of professional website management. By systematically reviewing changelogs, securing full database and file backups, leveraging staging environments, and conducting thorough post-update testing, you minimize the risks associated with software modifications. Treating every update as a carefully structured deployment rather than a simple click ensures your website delivers a consistently stable, fast, and secure experience for your long-term audience.
Looking for more WordPress and WooCommerce tips? Return to our main [ Knowledge Base ] to explore more step-by-step tutorials, troubleshooting guides, and best practices for your website.