
Knowledge, WordPress Troubleshooting
How to Troubleshoot Common WordPress Errors Like a Pro
Jul
WordPress errors can appear unexpectedly and affect your website’s layout, login access, checkout process, admin dashboard, or overall performance. For many website owners, the first reaction is to panic or immediately disable everything. However, a better approach is to follow a clear troubleshooting process that helps identify the real cause safely.
This guide explains how to troubleshoot common WordPress errors in a structured and professional way. It is written for WordPress users, WooCommerce store owners, and site administrators who want to diagnose issues without making the problem worse.
Before You Start Troubleshooting
Before making any changes, it is important to protect your website data. Troubleshooting without preparation can cause unnecessary downtime, lost settings, or broken layouts.
Create a Full Website Backup
Always create a full backup before editing files, changing plugins, switching themes, or updating WordPress. A complete backup should include:
- WordPress files
- Database
- Media uploads
- Plugin and theme settings
- WooCommerce order data, if applicable
If your hosting provider offers automatic backups, confirm that the latest backup is available and can be restored. For WooCommerce websites, avoid restoring an old database unless you understand the effect on recent orders and customer data.
Check the Error Message Carefully
Many WordPress errors provide useful clues. For example, you may see messages such as “There has been a critical error on this website,” “Error establishing a database connection,” “Allowed memory size exhausted,” or “Briefly unavailable for scheduled maintenance.”
Do not ignore these messages. Write them down or take a screenshot. The exact wording can help you identify whether the issue is related to a plugin, theme, server limit, database connection, or failed update.
Step-by-Step WordPress Error Troubleshooting
A professional troubleshooting process starts with the safest checks first. Avoid making too many changes at the same time because it can make the real cause harder to identify.
Step 1: Clear Cache and Test Again
Caching can sometimes make an old error appear even after the original issue has been fixed. Clear all active cache layers, including:
- WordPress cache plugin
- Browser cache
- Hosting cache
- CDN or Cloudflare cache
After clearing cache, test your website in a private browser window. If the issue disappears, the problem may have been caused by cached assets or outdated page data.
Step 2: Check Recently Updated Plugins or Themes
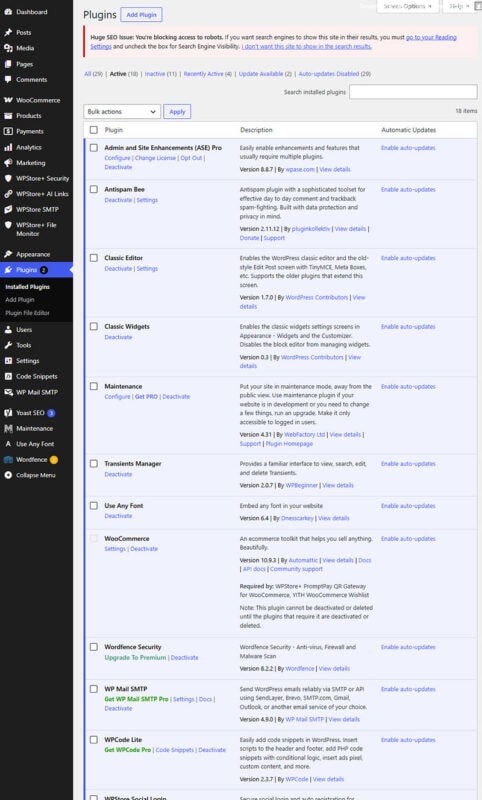
Many WordPress errors happen after a plugin, theme, or WordPress core update. If the issue started after an update, list the most recent changes.
Go to the Plugins page and check which plugins were recently updated. If you cannot access the admin dashboard, use your hosting file manager or FTP to rename the suspected plugin folder temporarily.
For example:
wp-content/plugins/plugin-name
Rename it to:
plugin-name-disabled
If the website works again, the plugin may be causing the issue.
Step 3: Test for Plugin Conflicts
Plugin conflicts are one of the most common causes of WordPress errors. To test this safely, deactivate non-essential plugins one by one and check whether the issue is resolved.
For WooCommerce websites, be careful when disabling payment gateways, shipping tools, or order-related plugins. If possible, perform testing on a staging site instead of the live store.
Step 4: Switch to a Default Theme Temporarily
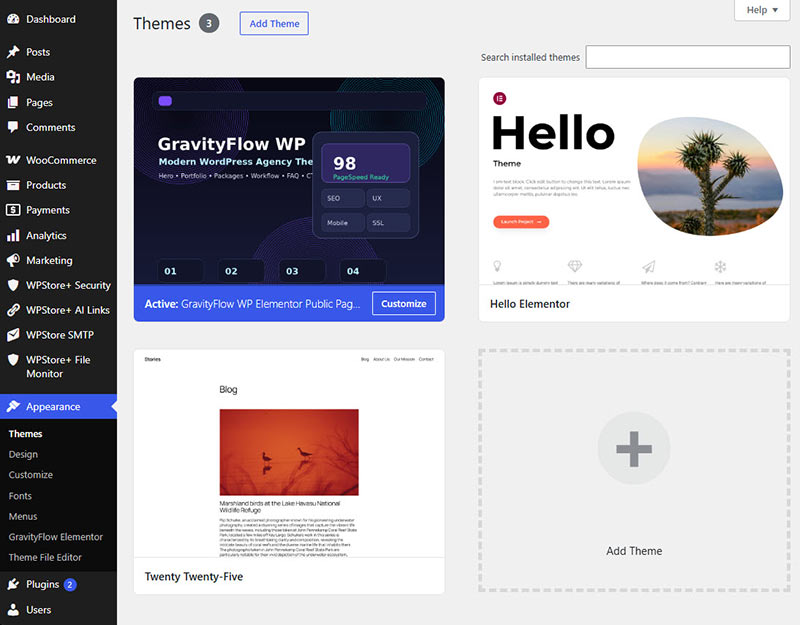
If plugins are not the cause, the active theme may be involved. Temporarily switch to a default WordPress theme such as Twenty Twenty-Four or Twenty Twenty-Five.
If the error disappears after switching themes, the issue may be related to theme templates, custom functions, outdated theme files, or compatibility with a plugin update.
Step 5: Enable WordPress Debug Mode
WordPress debug mode can help reveal technical errors that are hidden from normal visitors. You can enable it by editing the wp-config.php file.
Add or update these lines:
define('WP_DEBUG', true);
define('WP_DEBUG_LOG', true);
define('WP_DEBUG_DISPLAY', false);
This will save errors to the debug log file instead of showing them publicly on the website. After troubleshooting, remember to disable debug mode on a live website.
Step 6: Review Server and Hosting Limits
Some WordPress errors are caused by hosting limits rather than plugins or themes. Common server-related causes include low PHP memory, outdated PHP versions, strict security rules, database connection problems, or file permission issues.
Check these areas in your hosting control panel:
- PHP version
- PHP memory limit
- Error logs
- Database status
- Disk space usage
- Security firewall logs
If you are using WooCommerce, a higher memory limit is often recommended because store pages, checkout, and admin reports may require more resources.
Testing the Plugin
If the WordPress error is related to a plugin, test the plugin carefully before using it again on a live website.
Basic Plugin Testing Checklist
After reactivating the plugin, check the following:
- The WordPress admin dashboard loads correctly
- Plugin settings can be saved
- No critical error appears
- Frontend pages still load normally
- WooCommerce cart and checkout work, if applicable
- No new errors appear in
debug.log - The plugin is compatible with your WordPress, PHP, and WooCommerce versions
If the plugin requires a license, activate the license and test update checks, feature access, and any license-related admin notices. This helps confirm that the plugin is working correctly after the troubleshooting process.
FAQs
What is the most common cause of WordPress errors?
Plugin conflicts are one of the most common causes. Errors often appear after updates, especially when one plugin is not compatible with the current WordPress, theme, PHP, or WooCommerce version.
Should I disable all plugins at once?
It is better to deactivate plugins one by one when possible. This makes it easier to identify the exact plugin causing the issue. If the website is completely inaccessible, you may need to disable plugins through FTP or the hosting file manager.
Is it safe to enable debug mode?
Yes, but debug display should be disabled on live websites. Use WP_DEBUG_LOG to save errors privately to a log file instead of showing technical messages to visitors.
Should I troubleshoot directly on my live website?
For important websites or WooCommerce stores, using a staging site is safer. A staging site lets you test plugin conflicts, theme issues, and updates without affecting real visitors or customers.
When should I contact hosting support?
Contact your hosting provider if the issue involves database connection errors, server logs, PHP limits, file permissions, disk space, firewall blocks, or repeated 500 Internal Server Errors.
Summary
Troubleshooting WordPress errors like a pro requires a calm and structured process. Start with a backup, review the exact error message, clear cache, check recent updates, test plugins, switch themes when needed, and review debug logs carefully.
By making one change at a time, you can identify the real cause more accurately and reduce the risk of creating new problems. Whether the issue comes from a plugin conflict, theme incompatibility, server limit, or update failure, a step-by-step approach helps keep your WordPress website stable, secure, and easier to maintain.
Need help keeping your WordPress website stable and easier to manage? Explore WPStore+ tools and guides built for practical WordPress troubleshooting, maintenance, and security.