
Knowledge, WooCommerce
How to Set Up WooCommerce LINE Order Notifier with LINE Developers Console
Jun
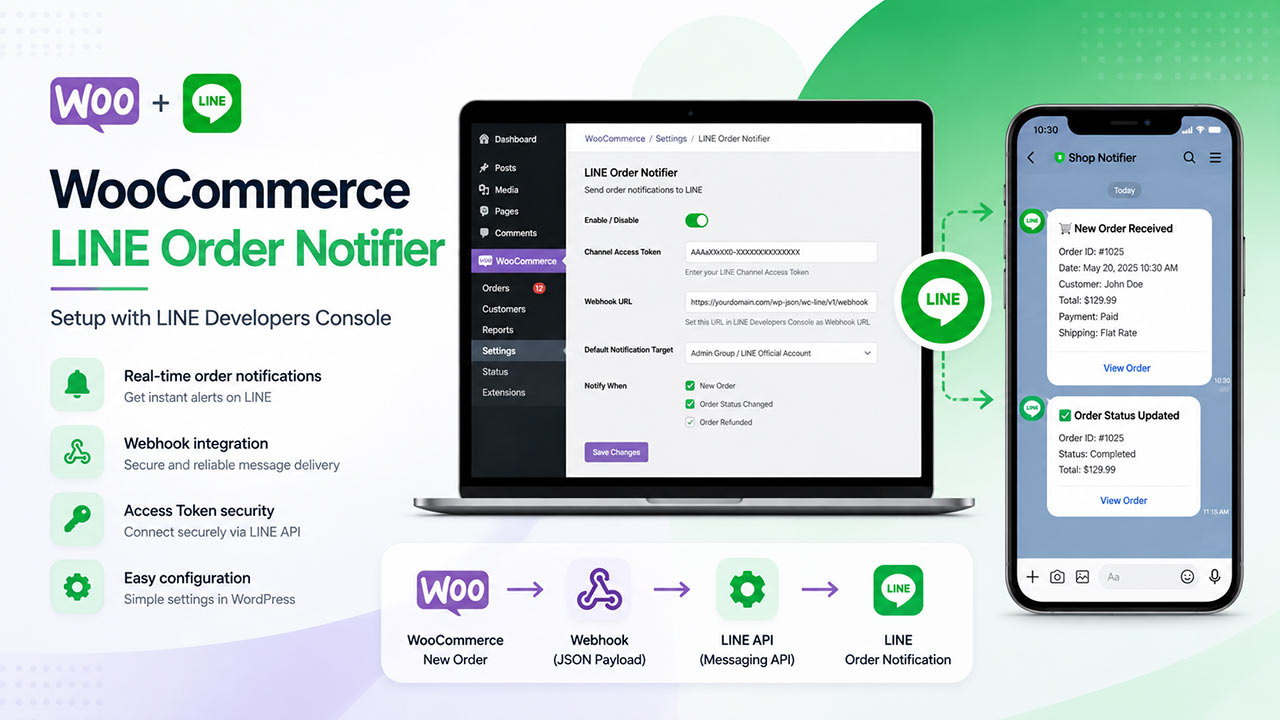
WooCommerce LINE Order Notifier helps store owners receive real-time order notifications directly in LINE. After the plugin is connected to a LINE Official Account through the LINE Messaging API, new WooCommerce orders can be sent to a LINE user, group chat, or internal team chat.
This guide explains how to create and configure the required LINE Messaging API settings, generate a Channel Access Token, connect the token to the plugin, and test WooCommerce order notifications.
Before You Start
Before setting up the plugin, make sure you have:
- A WordPress website with WooCommerce installed and activated
- WooCommerce LINE Order Notifier installed and activated
- A LINE account
- A LINE Official Account
- Access to LINE Official Account Manager
- Access to LINE Developers Console
- Administrator access to your WordPress dashboard
You should also make sure your website is running on HTTPS. LINE webhook communication and API integrations should be configured on a secure HTTPS website.
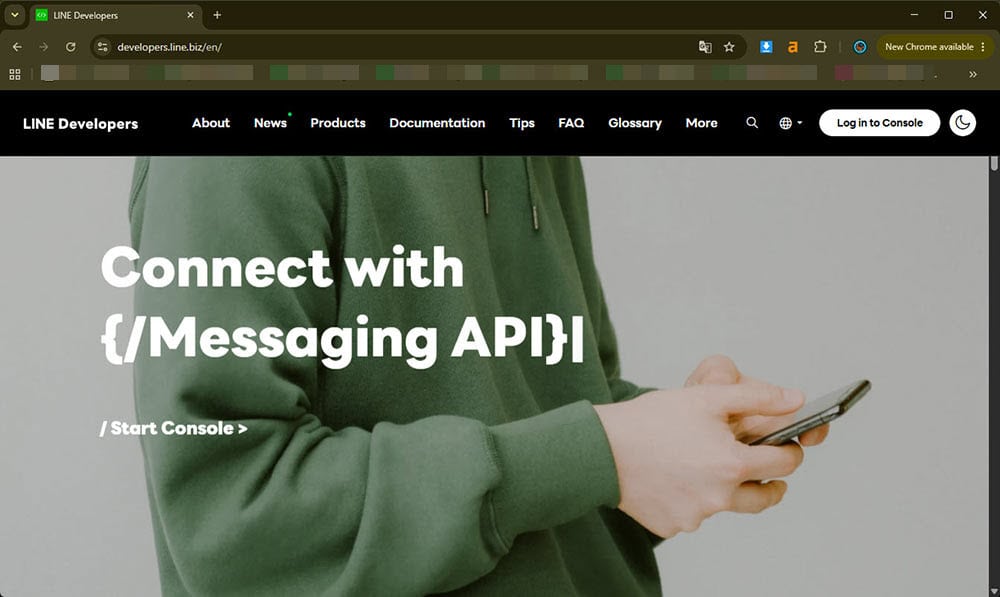
Step 1: Create or Prepare a LINE Official Account
WooCommerce LINE Order Notifier works through the LINE Messaging API. To use the Messaging API, you need a LINE Official Account.
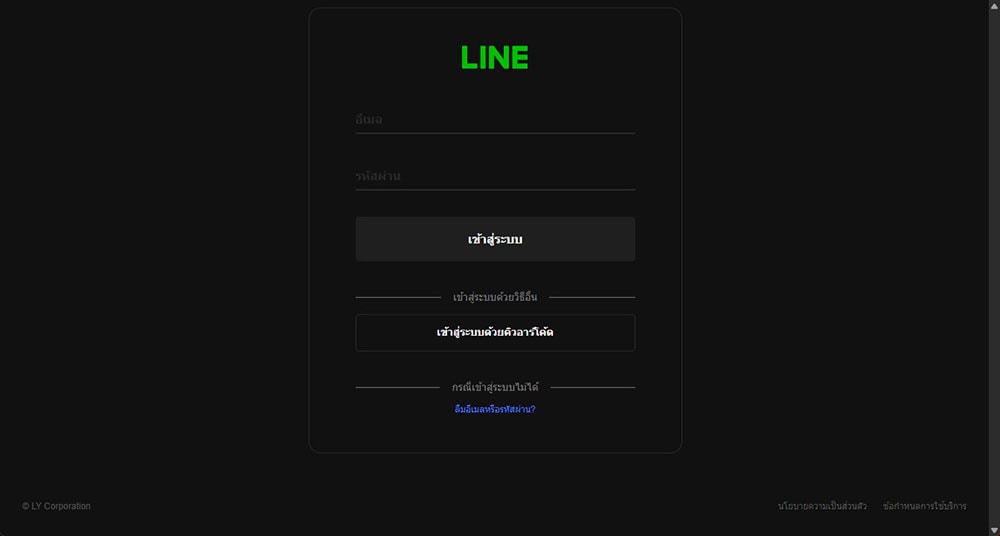
If you already have a LINE Official Account, you can use the existing account. If not, create a new LINE Official Account from LINE Official Account Manager.
After creating the account, open the account settings and confirm that the account is ready to use.
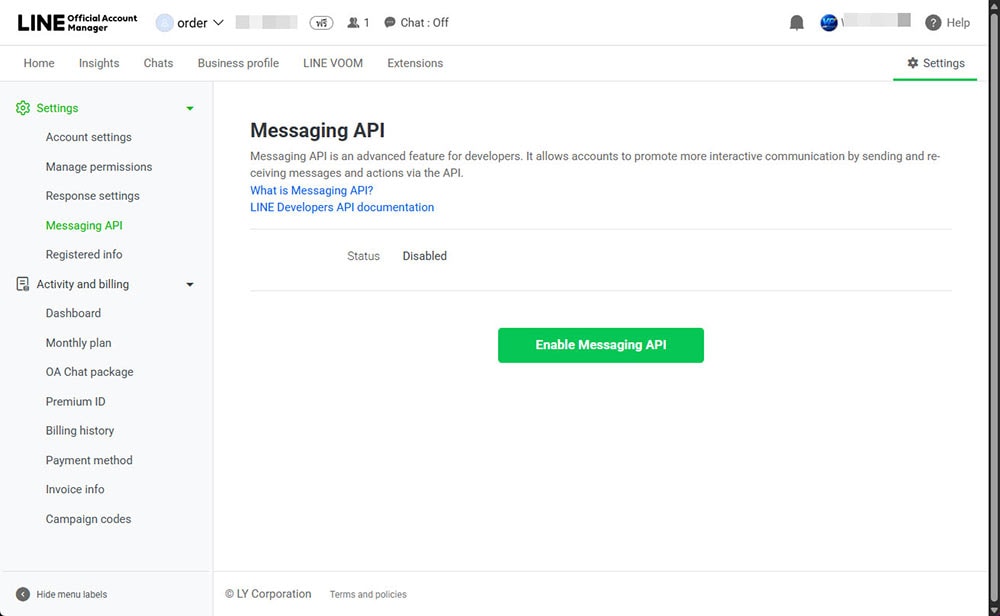
Step 2: Enable the Messaging API
After preparing your LINE Official Account, you need to enable the Messaging API.
Go to LINE Official Account Manager and open the LINE Official Account you want to use for WooCommerce order notifications.
Then go to the Messaging API settings and enable the Messaging API for that account.
When the Messaging API is enabled, LINE will create or connect a Messaging API channel for your LINE Official Account. This channel will appear inside LINE Developers Console.
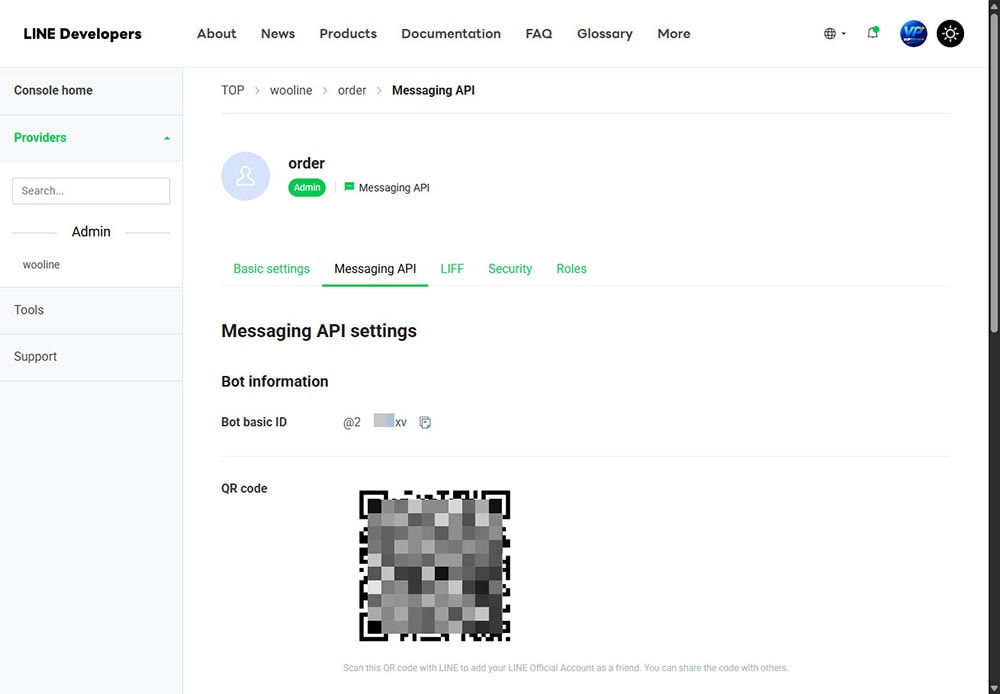
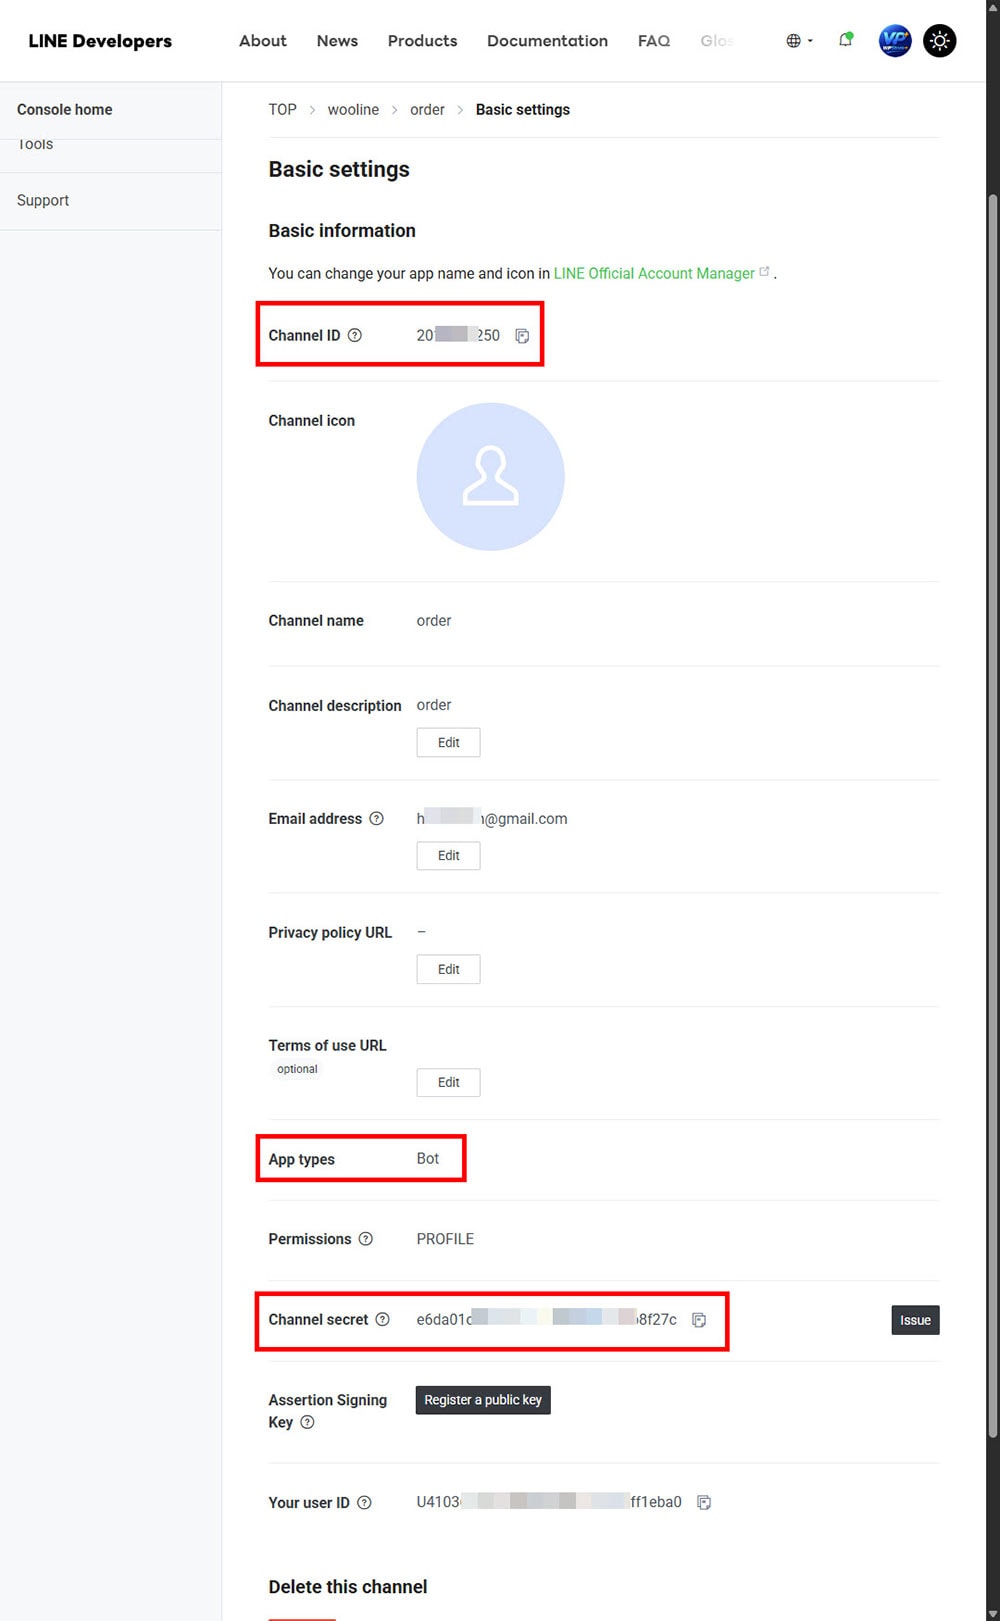
Step 3: Open the Channel in LINE Developers Console
After enabling the Messaging API, open LINE Developers Console.
Select the provider connected to your LINE Official Account, then open the Messaging API channel that belongs to your LINE Official Account.
Inside the channel settings, you will usually see important information such as:
- Channel ID
- Channel secret
- Bot basic ID
- Messaging API settings
- Webhook settings
- Channel access token settings
For WooCommerce LINE Order Notifier, the most important item is the Channel Access Token. Some plugin versions may also use the Channel Secret for webhook verification.
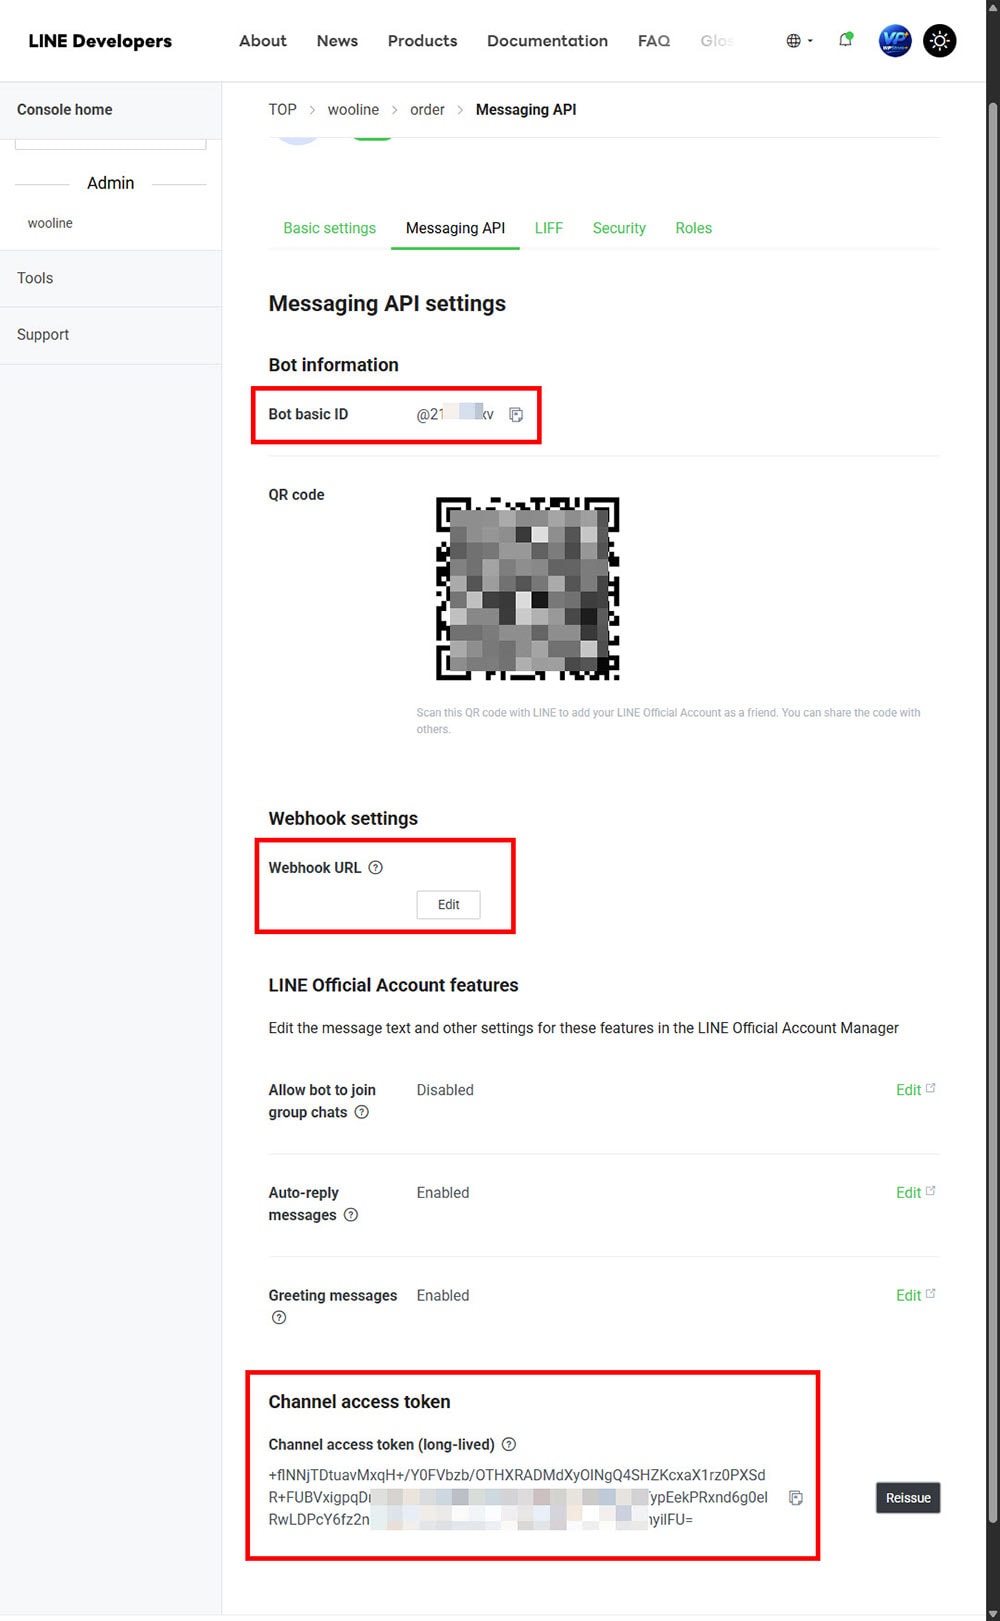
Step 4: Generate a Channel Access Token
In LINE Developers Console, open your Messaging API channel and go to the Messaging API tab.
Find the Channel access token section and issue a new token.
Copy the generated Channel Access Token and keep it private. This token allows your website to send messages through your LINE Official Account.
Do not share this token publicly, do not include it in screenshots, and do not send it to anyone who should not manage your LINE integration.
If you believe the token has been exposed, revoke it and issue a new one from LINE Developers Console.
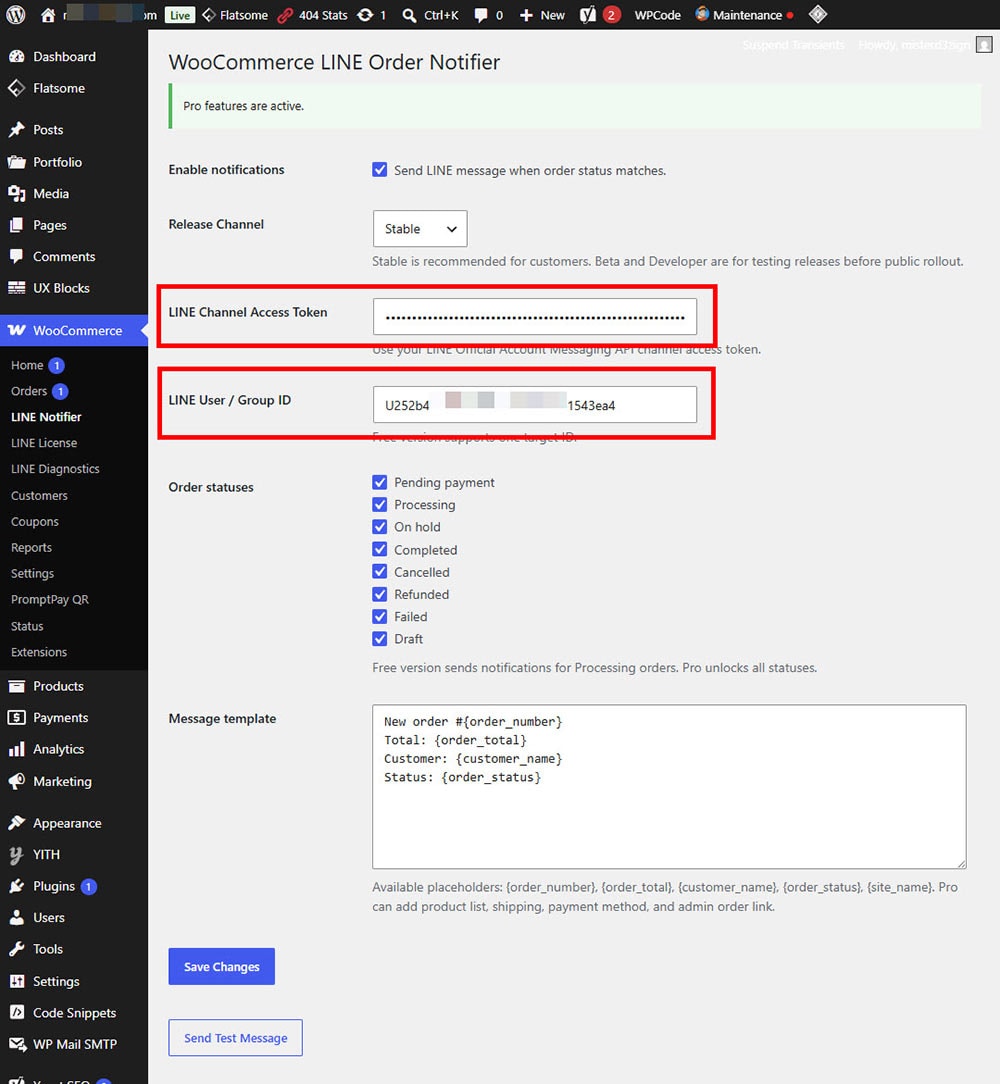
Step 5: Configure WooCommerce LINE Order Notifier
Log in to your WordPress dashboard and go to:
WooCommerce -> LINE Notifier
The exact menu name may vary depending on your plugin version.
Paste the Channel Access Token into the plugin setting field.
If your plugin also provides a Channel Secret field, copy the Channel Secret from LINE Developers Console and paste it into the plugin settings.
Then configure the notification target.
Depending on your plugin version, you may be able to send notifications to:
- A LINE user
- A LINE group
- A LINE room or chat target
- A configured recipient ID
If the plugin includes a test message button, save the settings first, then send a test message.
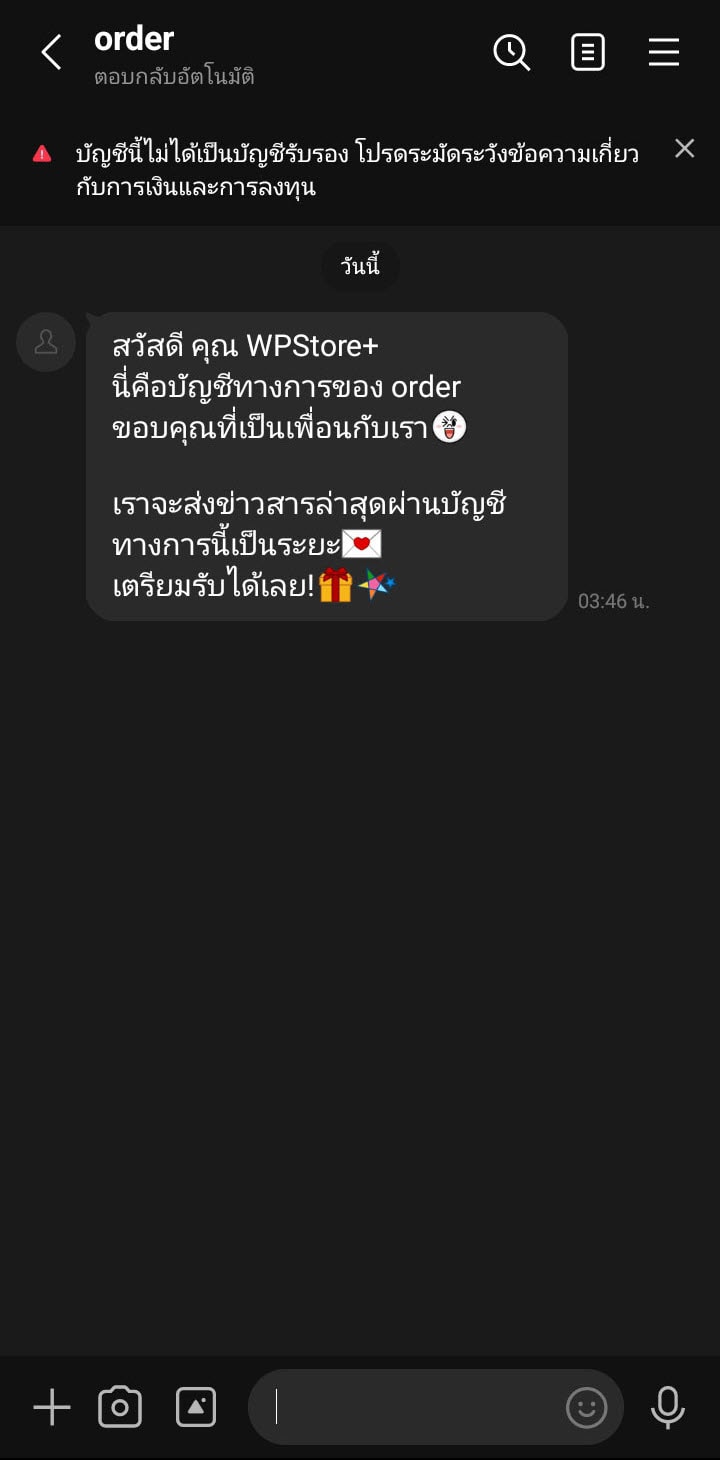
Step 6: Get the Recipient ID
To send WooCommerce order notifications, the plugin needs to know where the message should be delivered.
Common recipient types include:
- User ID
- Group ID
- Room ID
The easiest setup is usually to send notifications to a LINE user or a LINE group used by your store team.
If your plugin provides a webhook receiver URL, copy the webhook URL from the plugin settings and paste it into LINE Developers Console under the Webhook settings section.
The webhook URL usually looks similar to this:
https://yourdomain.com/wp-json/plugin-namespace/v1/line-webhook
The actual URL depends on your plugin version.
After adding the webhook URL, enable Use webhook in LINE Developers Console. Then verify the webhook connection if the console provides a verification button.
Once the webhook is active, send a message to the LINE Official Account or invite the bot to a group. The plugin may capture the User ID or Group ID from the incoming webhook event.
If the plugin has a log screen, check the latest webhook log and copy the correct recipient ID into the notification recipient field.
Do You Need to Set a Webhook URL?
No. WooCommerce LINE Order Notifier does not require a Webhook URL for basic order notifications.
This plugin sends WooCommerce order notifications from your WordPress website to your LINE Official Account using the LINE Messaging API and a Channel Access Token. The Webhook URL is only required when your application needs to receive events from LINE, such as incoming user messages, follow events, postback actions, or other interactions sent from the LINE Platform to your server.
For order notification use cases, you can leave the Webhook URL field empty in the LINE Developers Console, or keep webhook usage disabled if your LINE channel does not require two-way bot interaction.
Required settings for this plugin are:
- Channel Access Token
- Recipient ID, User ID, Group ID, or Room ID
- Order notification preferences
- Test message verification
After saving these settings in WordPress, use the Test Message feature to confirm that the plugin can send messages to your LINE Official Account successfully.
Step 7: Enable Group Chat Notifications
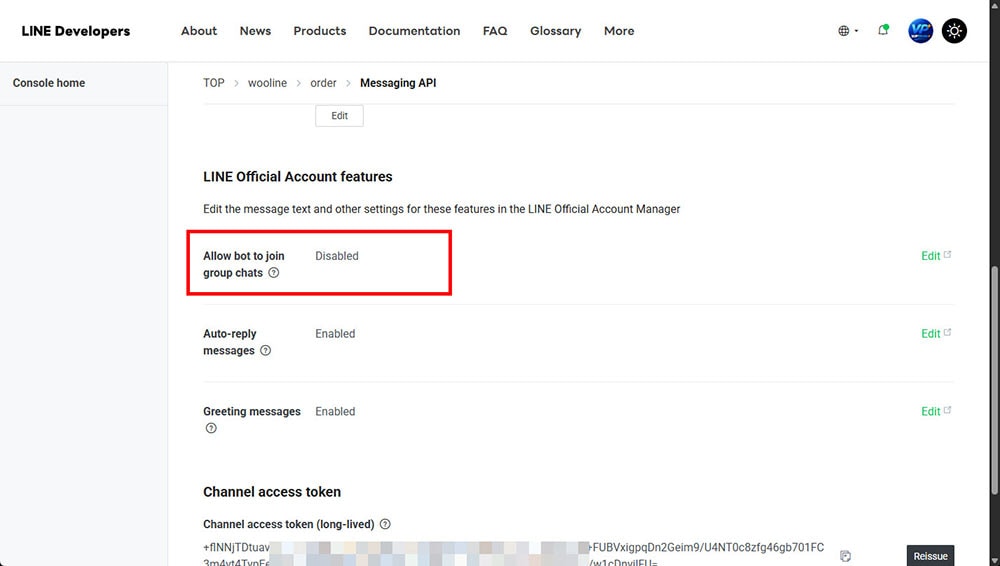
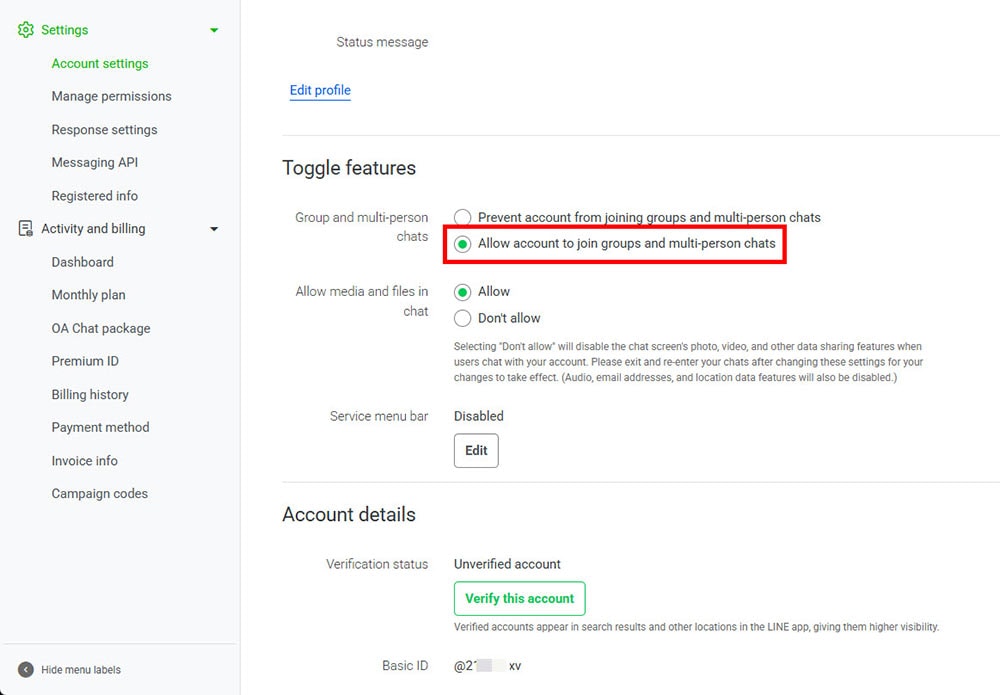
If you want to send WooCommerce order notifications to a LINE group, you must allow the LINE Official Account bot to join group chats.
In LINE Developers Console, open your Messaging API channel and go to the Messaging API tab.
Enable:
Allow bot to join group chats
After enabling this option, invite the LINE Official Account to your internal order notification group.
Send a test message inside the group so the plugin can detect or log the Group ID.
Then copy the Group ID into the plugin settings and save the configuration.
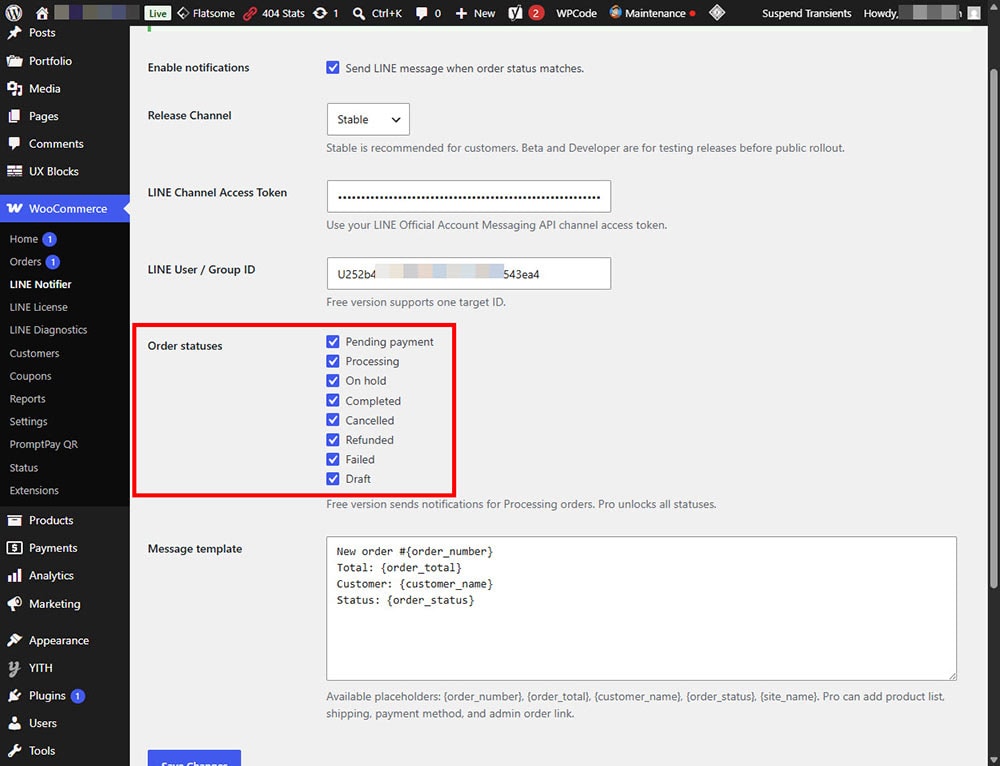
Step 8: Choose Which WooCommerce Events Should Trigger Notifications
WooCommerce LINE Order Notifier may allow you to choose which order events should send LINE notifications.
Recommended events include:
- New order
- Processing order
- Completed order
- Cancelled order
- Failed order
- Refunded order
For most stores, the most important notification is New order. This allows the store owner or team to respond quickly after a customer places an order.
You may also enable other order statuses depending on your workflow.
Step 9: Customize the Notification Message
If the plugin supports message templates, customize the LINE notification message to match your store workflow.
A good order notification should include:
- Order number
- Order status
- Customer name
- Customer phone number
- Order total
- Payment method
- Shipping method
- Ordered products
- Admin order link
Example message:
New WooCommerce Order
Order: #{order_id}
Status: {order_status}
Customer: {customer_name}
Total: {order_total}
Payment: {payment_method}
Products:
{order_items}
View order:
{admin_order_url}
Keep the message short and easy to scan. LINE notifications should help store owners take action quickly without opening the WordPress dashboard immediately.
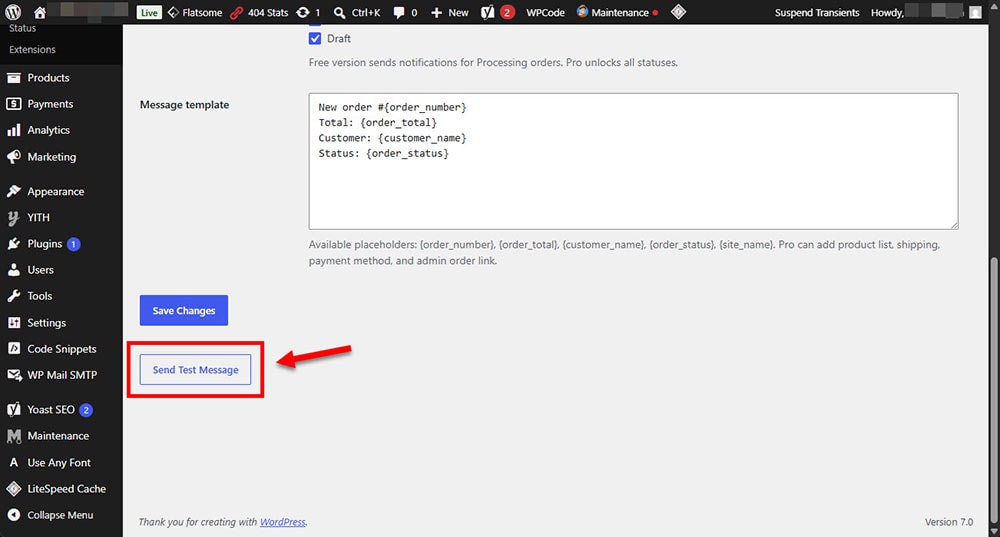
Step 10: Send a Test Message
After saving the settings, use the plugin’s test message feature if available.
A successful test means:
- The Channel Access Token is valid
- The recipient ID is correct
- The LINE Official Account can send messages to the target chat
- Your WordPress website can connect to the LINE Messaging API
If the test message fails, check the troubleshooting section below.
Step 11: Test with a Real WooCommerce Order
After the test message works, create a test WooCommerce order.
You can test by:
- Opening your store as a customer
- Adding a product to the cart
- Completing checkout
- Checking whether the LINE notification arrives
- Opening the WooCommerce order in the WordPress dashboard
- Confirming that the order details match the LINE notification
If the notification arrives correctly, the integration is ready for production use.
Troubleshooting
Test Message Does Not Arrive
Check the following:
- The Channel Access Token is correct
- The token has not been revoked
- The recipient ID is correct
- The LINE Official Account has been added as a friend
- The bot has been invited to the group if you are using group notifications
- Your website firewall is not blocking outgoing API requests
- Your server can connect to the LINE Messaging API
Invalid Channel Access Token
If you see an invalid token error, generate a new Channel Access Token in LINE Developers Console and update the plugin settings.
After saving the new token, send another test message.
Group Notification Does Not Work
If group notifications do not work, check that Allow bot to join group chats is enabled in the Messaging API settings.
Then remove and re-invite the LINE Official Account to the group if necessary.
Send a message in the group again and check whether the plugin can detect the Group ID.
Webhook Verification Fails
If webhook verification fails, check the following:
- The webhook URL uses HTTPS
- The webhook URL is publicly accessible
- WordPress REST API is not blocked
- Security plugins or firewalls are not blocking LINE requests
- The webhook endpoint belongs to the correct plugin
- The webhook URL was copied correctly
If your plugin only sends order notifications and does not require incoming webhook events, webhook setup may be optional.
WooCommerce Orders Are Created but No LINE Notification Is Sent
Check the plugin event settings and make sure the correct WooCommerce order status is enabled.
For example, if your payment gateway creates new orders as On hold, but the plugin only sends notifications for Processing, the notification may not be triggered.
Enable the order statuses that match your store workflow.
Security Recommendations
For better security, follow these best practices:
- Keep the Channel Access Token private
- Do not publish screenshots that show the token
- Revoke and regenerate the token if it is exposed
- Use HTTPS on your WordPress website
- Keep WordPress, WooCommerce, and the plugin updated
- Limit administrator access to trusted users only
- Check plugin logs regularly when testing the integration
Recommended Production Checklist
Before using the integration on a live WooCommerce store, confirm the following:
- LINE Official Account is created and active
- Messaging API is enabled
- Channel Access Token is generated
- Token is saved in the plugin settings
- Recipient ID is configured
- Test message is successful
- New order notification is successful
- Correct WooCommerce order statuses are enabled
- Notification message template is clear and readable
- No sensitive token is exposed in screenshots or logs
Conclusion
WooCommerce LINE Order Notifier is a practical way to receive WooCommerce order alerts directly in LINE. By connecting your WooCommerce store with LINE Developers Console and the LINE Messaging API, store owners can monitor new orders faster and reduce the chance of missing important sales activity.
Once the Channel Access Token, recipient ID, webhook settings, and order event settings are configured correctly, your store can automatically send real-time order notifications to your LINE account or internal team group.
Need real-time WooCommerce order alerts on LINE? Install WooCommerce LINE Order Notifier and connect your store with LINE Messaging API to receive instant order notifications.