
Knowledge, WordPress Security
How to Disable XML-RPC in WordPress Safely
Jul
Knowing how to disable XML-RPC in WordPress safely is an essential security measure for any modern website administrator. Originally designed to allow external applications to communicate with your WordPress installation, the xmlrpc.php file facilitated features like trackbacks, pingbacks, and remote publishing. However, as web technology has evolved, this legacy protocol has largely been superseded by the robust WordPress REST API. Today, leaving XML-RPC active exposes your server to severe vulnerabilities, including automated brute-force attacks and distributed denial-of-service (DDoS) threats. This official guide will walk you through the proper steps to neutralize this vulnerability, ensuring your website remains secure and operates at peak performance.
Initial Setup and Configuration
While it is possible to disable XML-RPC by manually editing core server files, utilizing a dedicated security plugin is the most reliable and efficient method. This approach prevents accidental syntax errors that could cause catastrophic site downtime. Below is the standard procedure for downloading, installing, and configuring a security plugin designed to resolve this vulnerability.
Downloading and Installing the Plugin
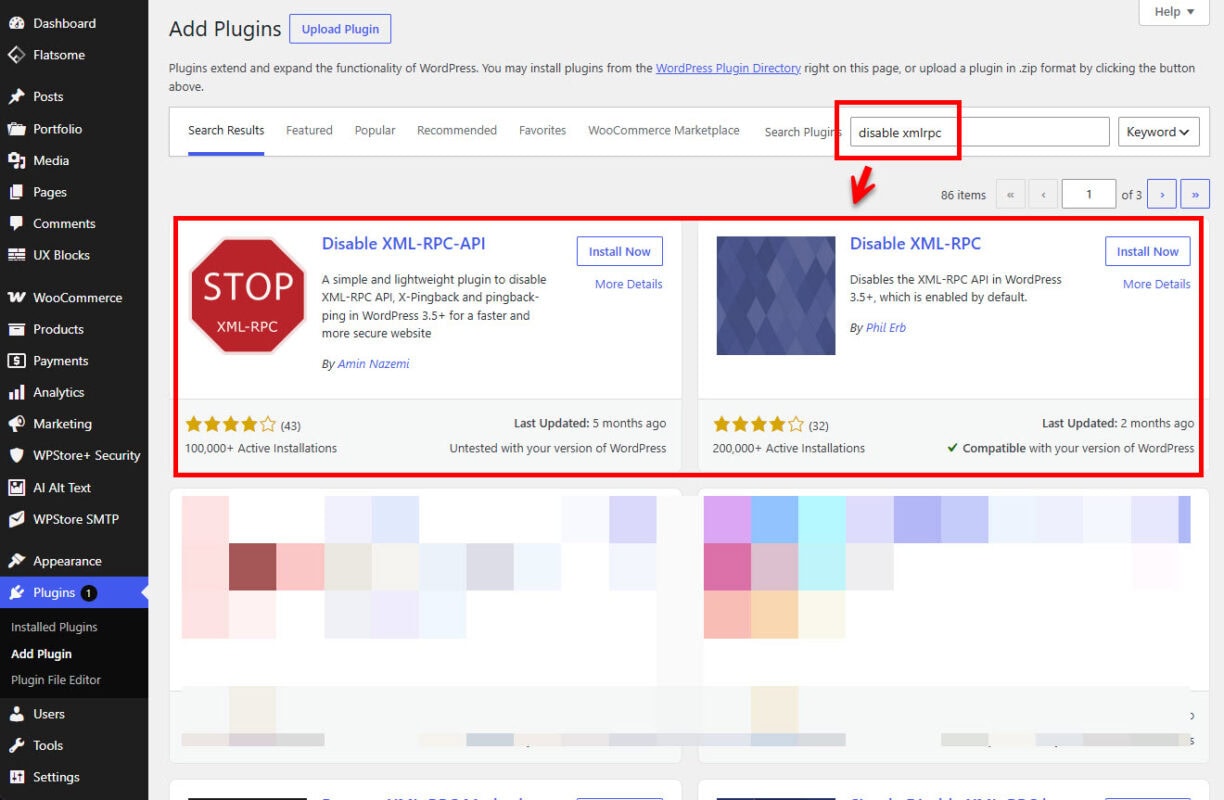
To begin the process, log in to your WordPress administrative dashboard. Navigate to the Plugins menu located on the left-hand sidebar and select Add New. In the search repository, type “Disable XML-RPC” or look for a comprehensive security suite of your choice. Once you have identified a reputable plugin, click the Install Now button. Wait a few moments for the system to securely unpack and load the necessary files onto your web server.
Activating the License and Basic Settings
After the installation completes, click the Activate button. If you are utilizing a premium security solution from WPStore+, you will be prompted to register your software. Navigate to the plugin’s new configuration menu and access the License or Activation tab. Input your authorized license key and click Save Changes to unlock the complete suite of security features.
For the basic configuration, proceed to the plugin’s main settings panel. Most lightweight XML-RPC plugins operate instantly upon activation with zero configuration required. However, if you are using an all-in-one security suite, you must manually locate the Advanced Tweaks or System Tweaks section. Find the specific option labeled “Disable XML-RPC” and toggle it to the active or enabled position. Always ensure that you click Save All Changes before navigating away from the dashboard.
Crucial Precautions Before Proceeding
Before implementing these security modifications, it is highly recommended to generate a complete backup of your WordPress database and system files. While disabling XML-RPC is safe for the vast majority of modern websites, certain legacy applications or specific configurations of the Jetpack plugin may still rely on this protocol. Maintaining a recent backup ensures that you can quickly restore your website’s functionality if any third-party integrations experience unexpected connectivity issues.
Testing the Plugin
Once you have completed the setup process, it is critical to verify that the vulnerability has been successfully closed. Testing the plugin ensures that unauthorized external requests are properly blocked by your server.
To conduct a straightforward diagnostic test, open a new tab in your web browser and enter your website’s domain followed by /xmlrpc.php (for example, [https://yourdomain.com/xmlrpc.php](https://yourdomain.com/xmlrpc.php)). If the security plugin is functioning correctly, you should receive a 403 Forbidden error message, or a dedicated screen stating that access is denied.
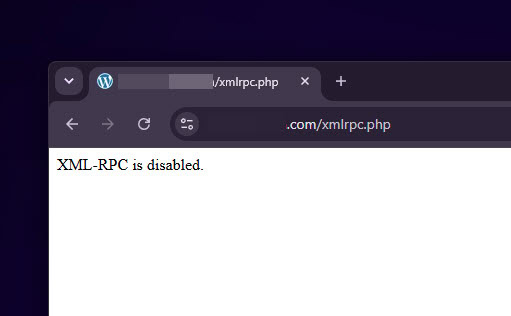
If the browser displays a message stating “XML-RPC server accepts POST requests only,” the feature remains active, indicating that you must review your plugin settings or clear your website’s cache. Additionally, you can utilize free online XML-RPC validator tools to ping your server externally and confirm that the connection is securely terminated. ✅
FAQs
Will disabling XML-RPC negatively impact my website’s loading speed? No, it will actually improve your website’s overall performance and stability. By blocking automated brute-force attacks and continuous malicious pingback requests, you eliminate unnecessary server load and preserve your hosting resources for legitimate traffic.
Do I still need XML-RPC if I use the official WordPress mobile application? Modern versions of the official WordPress mobile application utilize the WordPress REST API rather than XML-RPC for remote publishing and content management. Therefore, disabling this outdated protocol will not interfere with your ability to manage your site from your mobile device.
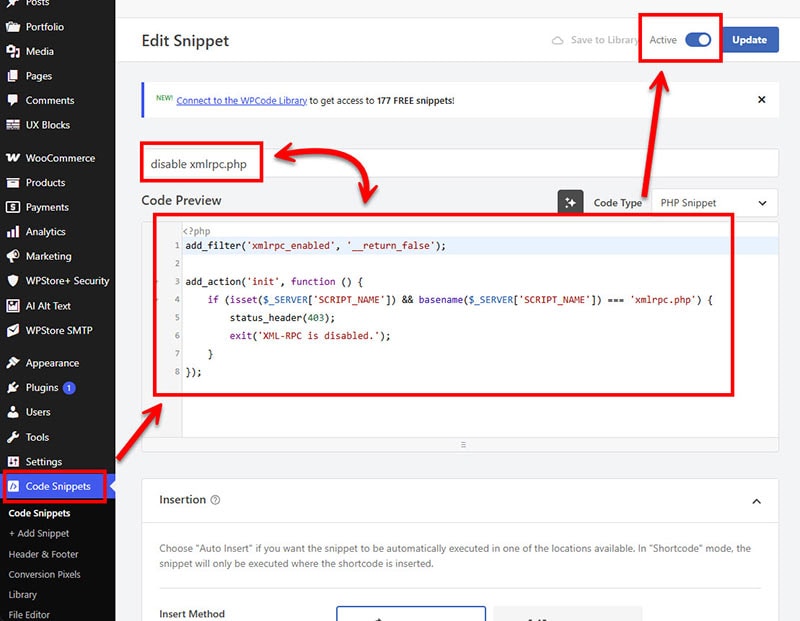
Can I disable it manually without installing another plugin? Yes. Advanced users can disable XML-RPC by adding specific blocking directives directly to their server’s .htaccess file. However, using a verified security plugin is strongly recommended for most users to avoid accidental site outages caused by improper code formatting.
Summary
Securing your digital infrastructure must always remain a top priority for website owners. By understanding how to disable XML-RPC in WordPress safely, you proactively eliminate one of the most commonly exploited access points used by malicious actors. Whether you choose to implement a lightweight standalone tool or integrate a comprehensive premium security suite, taking the time to properly install, activate, and test this configuration will significantly fortify your platform. The setup process is highly straightforward, requires minimal technical expertise, and delivers immediate, tangible protection against unauthorized remote access attempts.
Looking for more WordPress and WooCommerce tips? Return to our main Knowledge Base to explore more step-by-step tutorials, troubleshooting guides, and best practices for your website.