
Knowledge, WordPress Tips & Tutorials
Best Ways to Optimize Images for WordPress
Nov
Optimize images for WordPress to improve website loading speed, reduce unnecessary bandwidth usage, and provide a better browsing experience for visitors. Images are essential elements of modern websites, but improperly sized or uncompressed image files can increase page weight and contribute to slower loading times.
Whether you operate a personal blog, business website, online portfolio, or WooCommerce store, image optimization should be part of your regular website maintenance routine.
High-resolution photographs, product images, screenshots, and featured images can consume substantial storage space. When these files are uploaded without proper preparation, visitors may need to download more data than necessary to view a webpage.
This can be particularly noticeable on mobile devices and slower internet connections.
Image optimization involves several techniques, including resizing images, selecting appropriate file formats, applying compression, configuring responsive images, and using suitable loading strategies.
These practices can also support search engine optimization (SEO). Faster-loading pages may provide better user experiences, while descriptive alternative text helps search engines understand image content and improves accessibility.
WordPress includes several built-in image management capabilities, such as automatic image size generation, responsive image attributes, and native lazy loading. However, additional optimization may still be necessary depending on your theme, hosting environment, and media library.
Some website owners prefer to optimize images manually before uploading them. Others use WordPress plugins to automate compression, format conversion, or the optimization of existing images.
Both approaches can be effective when configured correctly.
This guide explains practical methods for optimizing WordPress images, choosing appropriate formats, configuring optimization tools, and verifying results.
By following these recommendations, website owners can establish a reliable image optimization workflow while maintaining acceptable visual quality.
1. Understand Why Image Optimization Matters
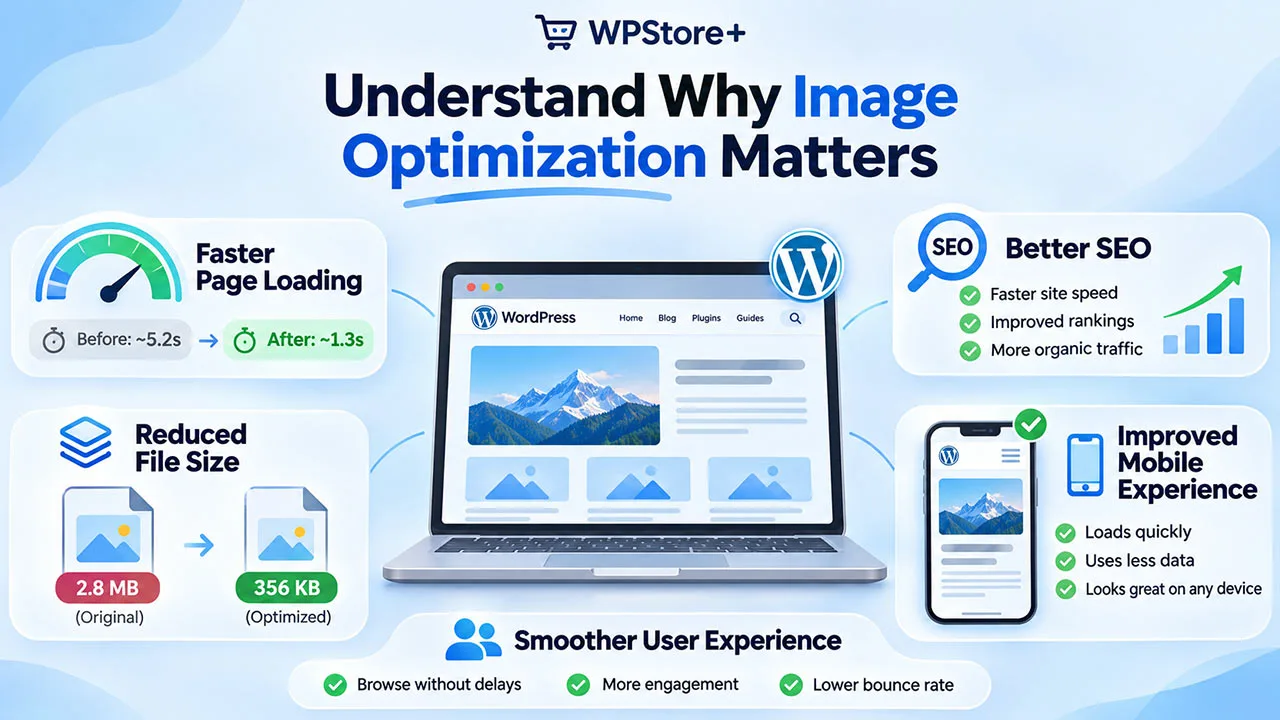
Before modifying your website’s images, it is helpful to understand how image files affect overall website performance.
1.1 Improve Website Loading Speed
Large image files increase the amount of data transferred between the web server and the visitor’s browser.
For example, a page containing five images of 2 MB each may require approximately 10 MB of image downloads before accounting for other website resources.
Reducing unnecessary image data can improve loading efficiency, especially for mobile visitors.
1.2 Support Core Web Vitals
Images can influence Google’s Core Web Vitals, particularly:
- Largest Contentful Paint (LCP): Measures when the largest visible content element finishes rendering.
- Cumulative Layout Shift (CLS): Measures unexpected movement of visible page elements.
- Interaction to Next Paint (INP): Measures responsiveness to user interactions.
Optimizing a prominent image can improve LCP. Providing appropriate image dimensions can also help prevent layout shifts.
Image optimization does not directly resolve every Core Web Vitals issue, including those involving JavaScript execution or server response times.
1.3 Improve User Experience and Accessibility
Appropriately optimized images help pages display efficiently across different devices.
Descriptive alternative text also allows visitors using assistive technologies to understand meaningful visual content.
These improvements support a more accessible and usable website.
2. Choose the Right Image Format
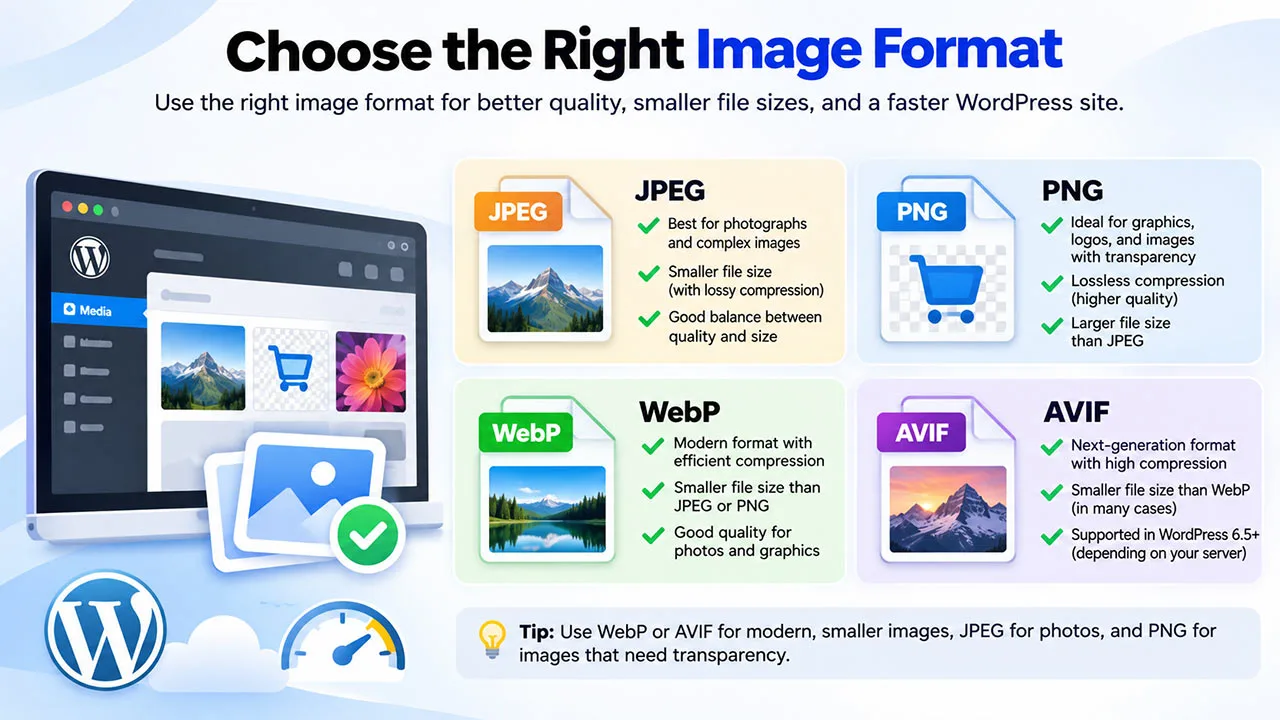
Different image formats provide different advantages. Selecting the correct format is an important first step.
2.1 JPEG for Photographs
JPEG is suitable for photographs, product images, and other visuals containing complex colors.
It supports lossy compression, allowing file sizes to be reduced by removing some image information.
However, excessive compression may introduce visible artifacts.
2.2 PNG for Transparency and Graphics
PNG is useful for graphics requiring transparency, sharp edges, or lossless image storage.
Common examples include logos, interface graphics, and screenshots containing text.
PNG files can be significantly larger than compressed photographs, so they should not automatically be used for every image.
2.3 WebP for Modern Websites
WebP supports lossy and lossless compression and can offer smaller files than JPEG or PNG at comparable visual quality.
WordPress supports WebP uploads, although processing capabilities may depend on the hosting environment.
WebP is a practical option for many website photographs and graphics.
2.4 AVIF for Efficient Compression
AVIF is another modern image format that can provide efficient compression.
WordPress 6.5 introduced AVIF support, subject to the image-processing capabilities available on the server.
Before adopting AVIF extensively, verify that your hosting environment can process the format and that images display correctly in your visitors’ browsers.
3. Resize Images Before Uploading
Uploading images at unnecessarily large dimensions is a common cause of excessive file sizes.
3.1 Determine the Required Dimensions
Consider how the image will appear on the website.
For example:
| Image Type | Example Dimensions |
|---|---|
| Blog featured image | 1200 × 675 pixels |
| Product image | 1000 × 1000 pixels |
| Article illustration | 1200 × 800 pixels |
| Small thumbnail | 300 × 300 pixels |
These dimensions are examples rather than universal requirements. Your theme, layout, and display density may require different sizes.
3.2 Resize Images Using an Editing Tool
Before uploading:
- Open the image in an image editing application.
- Select the resize or image dimensions option.
- Maintain the original aspect ratio.
- Enter appropriate dimensions.
- Export the resized image using a suitable format.
Avoid enlarging small images beyond their original resolution because this may reduce visual clarity.
3.3 Understand WordPress Image Sizes
WordPress can generate multiple sizes when an image is uploaded.
Navigate to:
WordPress Dashboard → Settings → Media
You can review standard thumbnail, medium, and large image settings.
Themes and plugins may register additional image sizes, so changing these settings does not necessarily modify every generated image.
4. Compress Images Without Unnecessary Quality Loss
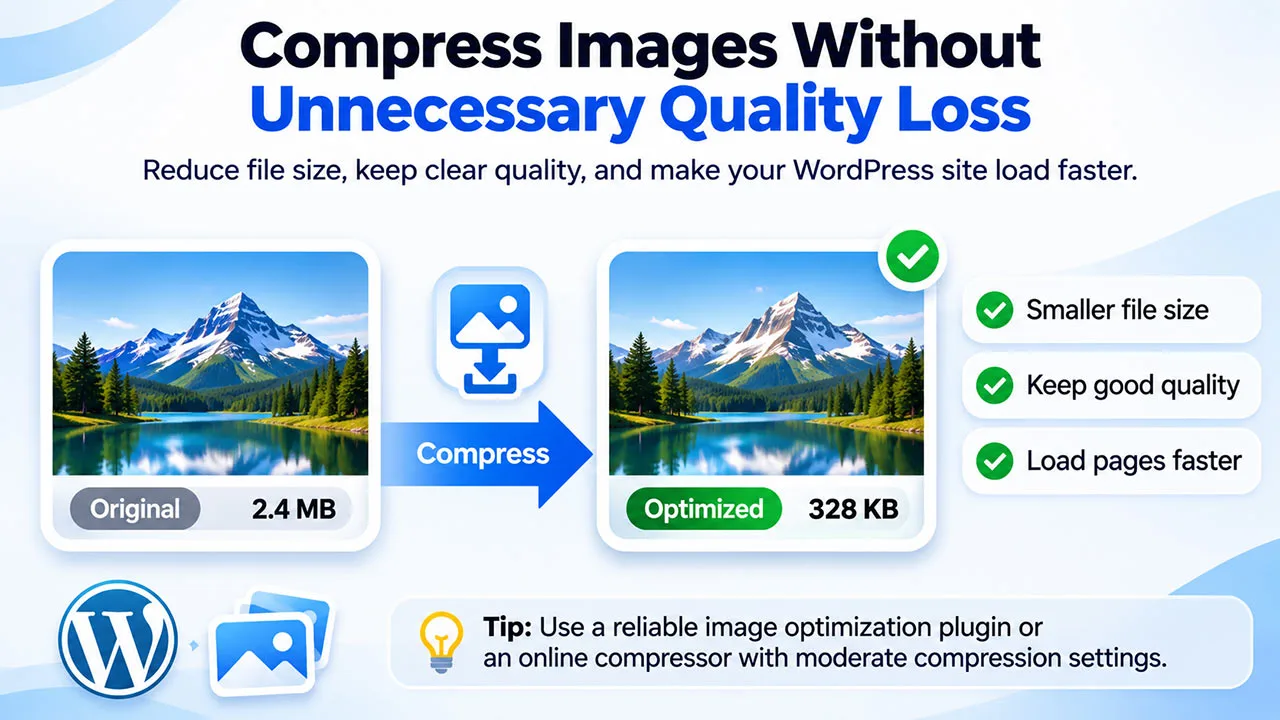
Image compression reduces file size while attempting to preserve visual appearance.
4.1 Lossy Compression
Lossy compression removes image information to produce smaller files.
It is often suitable for photographs and product images where minor visual differences are acceptable.
Always inspect compressed results before publishing.
4.2 Lossless Compression
Lossless compression reduces file size without discarding the underlying image information.
It can be useful for graphics, screenshots, and other images where retaining precise details is important.
However, file size reductions may be smaller than those achieved with lossy compression.
4.3 Establish a Compression Workflow
A simple workflow includes:
- Resize the original image.
- Select the appropriate image format.
- Apply moderate compression.
- Compare the optimized image with the original.
- Check fine details and text readability.
- Upload the optimized file to WordPress.
Avoid applying repeated lossy compression to the same file, as quality degradation may accumulate.
5. Install and Configure an Image Optimization Plugin
Image optimization plugins can automate repetitive tasks, particularly on websites containing large media libraries.
5.1 Install a WordPress Plugin
Navigate to:
Dashboard → Plugins → Add New Plugin
Search for a suitable image optimization plugin.
Common options include:
- ShortPixel Image Optimizer
- Imagify
- EWWW Image Optimizer
- Smush
Review each plugin’s documentation, compatibility, pricing, and processing requirements before installation.
Select the plugin, click Install Now, and then choose Activate.
5.2 Configure Basic Optimization Settings
Open the plugin’s settings page.
Depending on the selected plugin, available options may include:
- Automatic optimization during upload
- Image compression quality
- WebP or AVIF conversion
- Original image backups
- Maximum image dimensions
- Bulk optimization
Menu names and available features vary between plugins.
Begin with conservative settings and verify the results before enabling additional processing.
5.3 Activate a License if Required
Some image optimization plugins offer premium features or subscription-based processing services.
If your selected plugin requires a license:
- Open its account or license settings.
- Enter the license key or connect the relevant account.
- Complete activation.
- Verify whether additional processing credits or API configuration are required.
Free plugins or free features may not require license activation.
5.4 Optimize Existing Images
Some plugins include bulk optimization tools for images already stored in the Media Library.
Before starting a large operation:
- Create a reliable website backup.
- Confirm sufficient available storage.
- Review the plugin’s backup and restoration options.
- Test optimization on a small selection of images.
Bulk processing may require considerable server resources, depending on the number and size of images.
6. Configure Responsive Images
Responsive images allow browsers to choose appropriate image resources based on display characteristics.
WordPress automatically generates responsive image markup for many images through attributes such as srcset and sizes.
6.1 Understand Responsive Image Delivery
A desktop visitor may require a larger image than someone browsing on a narrow mobile screen.
Responsive image markup helps the browser select an appropriate available image resource.
This can reduce unnecessary downloads without sacrificing the required display quality.
6.2 Check Your Theme’s Image Handling
Most modern WordPress themes support responsive images.
However, custom templates, manually embedded HTML, or certain page-builder configurations may require additional inspection.
Check that images display correctly on mobile, tablet, and desktop layouts.
Avoid using CSS alone to shrink an excessively large image when a smaller source image would be more appropriate.
7. Use Lazy Loading Correctly
Lazy loading delays the loading of certain images until they approach the visible area of a webpage.
WordPress provides native lazy-loading functionality for eligible images.
7.1 Benefits of Lazy Loading
Lazy loading can reduce unnecessary network activity during the initial page load.
It is particularly useful for long articles, product listings, and pages containing many images below the visible area.
7.2 Avoid Lazy Loading Important Images
Images immediately visible when a page opens generally should not be delayed unnecessarily.
For example, lazy loading a large hero image that becomes the Largest Contentful Paint element may negatively affect loading performance.
WordPress includes loading optimizations, but website-specific implementations should still be verified.
7.3 Prevent Duplicate Optimization Features
Some performance plugins, themes, and image optimization plugins provide overlapping lazy-loading functionality.
Avoid enabling multiple independent implementations without testing their compatibility.
Conflicting settings can cause delayed images, missing visuals, or inconsistent loading behavior.
8. Improve Image SEO with Descriptive ALT Text
Alternative text describes meaningful image content and improves accessibility.
It may also help search engines interpret images in context.
8.1 Add ALT Text in WordPress
Navigate to:
Dashboard → Media → Library
Select an image and locate the Alternative Text field.
Enter a concise description that accurately represents the image.
For example:
Image: A WordPress dashboard displaying image optimization settings.
ALT Text: WordPress image optimization settings showing compression options.
8.2 Avoid Keyword Stuffing
Do not repeatedly insert keywords into alternative text simply to influence search rankings.
Instead, describe what the image communicates.
Purely decorative images generally should use empty alternative text rather than unnecessary descriptions.
8.3 Use Descriptive Filenames
Before uploading images, use filenames that identify the subject.
For example:
wordpress-image-optimization-settings.webp
is more descriptive than:
IMG_004582.webp
Use readable words separated by hyphens, and avoid excessive keywords.
9. Consider a Content Delivery Network
A Content Delivery Network (CDN) can distribute image resources through geographically distributed servers.
This may reduce image delivery latency for visitors located far from the origin server.
9.1 Understand CDN Image Delivery
When configured correctly, a CDN can cache images and serve them from a suitable network location.
Some CDN services also support image resizing, format conversion, or automatic compression.
These capabilities depend on the provider and service configuration.
9.2 Verify CDN Compatibility
Before enabling image delivery optimizations:
- Check whether images are served through the CDN.
- Confirm that secure HTTPS URLs are used.
- Verify that image URLs remain accessible.
- Test responsive image behavior.
- Check whether cached images update after replacement.
Avoid assuming that enabling a CDN automatically compresses or converts every image.
10. Testing the Optimization Results
Testing helps confirm that optimization changes improve performance without damaging image quality or website functionality.
10.1 Test with Google PageSpeed Insights
Visit:
Enter your website URL and run an analysis.
Review the mobile and desktop results.
Pay attention to image-related recommendations, including image delivery efficiency, loading priority, and appropriately sized resources.
10.2 Compare Before and After Results
Record baseline measurements before implementing changes.
After optimization, repeat the tests under comparable conditions.
Review:
- Total image transfer size
- Largest Contentful Paint
- Cumulative Layout Shift
- Overall page loading behavior
- Image clarity and rendering
Performance results can vary because of network conditions, caching, server load, and testing environments.
10.3 Test WordPress and WooCommerce Pages
Inspect important pages, including:
- Homepage
- Blog articles
- Product pages
- Product galleries
- Category archives
- Shopping cart and checkout
Verify that images display properly across different screen sizes.
For WooCommerce stores, confirm that product gallery thumbnails, zoom functionality, and image variations continue to work.
10.4 Check for Optimization Conflicts
If images disappear or display incorrectly, temporarily review recently enabled optimization features.
Check lazy loading, CDN rewriting, image format conversion, and caching settings.
Restore the previous configuration when necessary and isolate the conflicting feature before re-enabling optimization.
11. FAQs
What is the best image format for WordPress?
WebP is a practical choice for many WordPress images because it offers efficient compression and broad browser support.
JPEG, PNG, and AVIF may be preferable depending on image content, transparency requirements, and compatibility.
Does WordPress automatically optimize images?
WordPress provides image resizing, responsive image support, and loading optimizations.
However, additional compression or format conversion may still be beneficial.
Can image compression reduce quality?
Yes. Lossy compression may introduce visible quality changes, especially at aggressive compression levels.
Choose settings based on the image’s purpose and inspect the results.
Should I optimize existing images?
Optimizing existing images can reduce unnecessary file sizes.
Create a backup and test a small group before performing bulk optimization.
Will image optimization improve SEO rankings?
Image optimization can support loading performance, accessibility, and user experience.
However, search rankings depend on many factors, and image optimization alone does not guarantee ranking improvements.
Do I need a paid image optimization plugin?
Not necessarily.
Manual compression, WordPress’s built-in capabilities, and free optimization tools may be sufficient for smaller websites.
Paid services may be useful when processing large image libraries or requiring additional automation.
12. Summary
Optimizing images is an important part of maintaining an efficient WordPress website.
Start by selecting appropriate image formats, resizing images before uploading, and applying suitable compression.
Use WordPress’s responsive image capabilities and loading optimizations, and review alternative text for meaningful visual content.
For larger websites, image optimization plugins and CDN services can simplify ongoing media management.
Finally, measure performance before and after making changes and verify that images remain clear and functional.
A consistent optimization workflow can reduce unnecessary image data, improve loading efficiency, and support a better browsing experience.
Explore More WordPress Optimization Resources
Looking for additional ways to maintain and improve your WordPress website?
Explore the WPStore+ WordPress Plugins and Solutions to discover tools for website performance, SEO management, security, and everyday WordPress administration.